
Creating a Sequence Diagram
The Sequence Diagram Plugin is an external plugin that can be installed from the DevScribe Plugin Store. Once installed, you can create sequence diagrams to document interactions between users, services, APIs, and systems.
Installing the Sequence Diagram Plugin
Before creating a sequence diagram, install the plugin from the Plugin Store.
How to Install
- Open the Plugin Store.
- Search for Sequence Diagram.
- Click Download.
- Wait for the installation to complete.
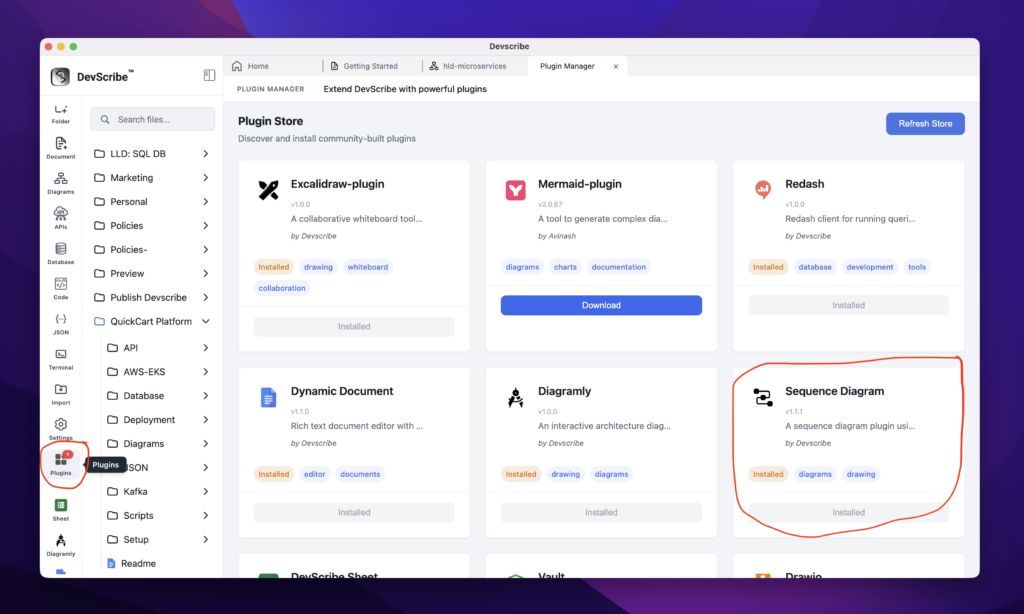
After installation, the Sequence Diagram icon will appear in the left navigation bar and in the Add File options.
Create from a Project Folder
Create a sequence diagram inside a project folder to keep it organized with your documentation, APIs, code files, and other project artifacts.
How to Create
- Navigate to the folder where you want to create the sequence diagram.
- Click the horizontal three-dot (⋯) More Options menu next to the folder.
- Select Add Sequence Diagram.
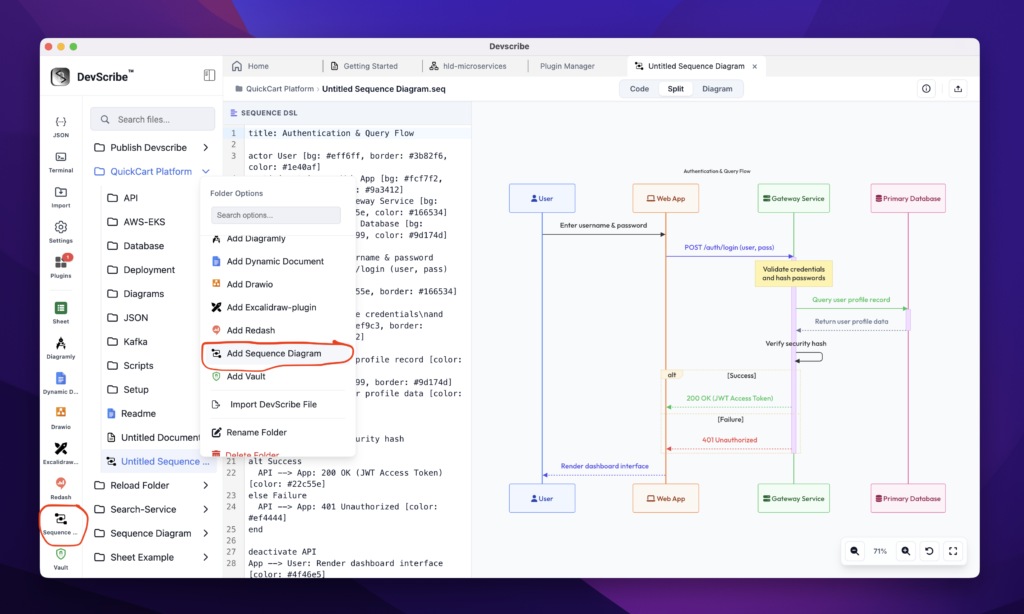
The new sequence diagram will be added to the selected folder and opened automatically in the Sequence Diagram Plugin.
Create from the Left Navigation Bar
You can also create a sequence diagram directly from the left navigation panel.
How to Create
- Click the Sequence Diagram icon in the left navigation bar.
- Enter a name for the diagram.
- Click Create.
A new sequence diagram is created and opened in the Sequence Diagram Plugin, allowing you to immediately begin documenting interactions between systems and services.
