Configure Java
To execute Java programs in the Code Plugin, Java must be installed on your local machine. DevScribe uses your local Java installation to compile and run Java code.
Prerequisites
Before configuring Java in DevScribe:
- Install a Java Development Kit (JDK) on your machine.
- Verify the installation by running the following command in your terminal:
java -versionIf Java is installed correctly, the installed version will be displayed.
Note: DevScribe uses your local Java runtime and compiler. It does not include a bundled JDK or JVM.
Open Java Settings
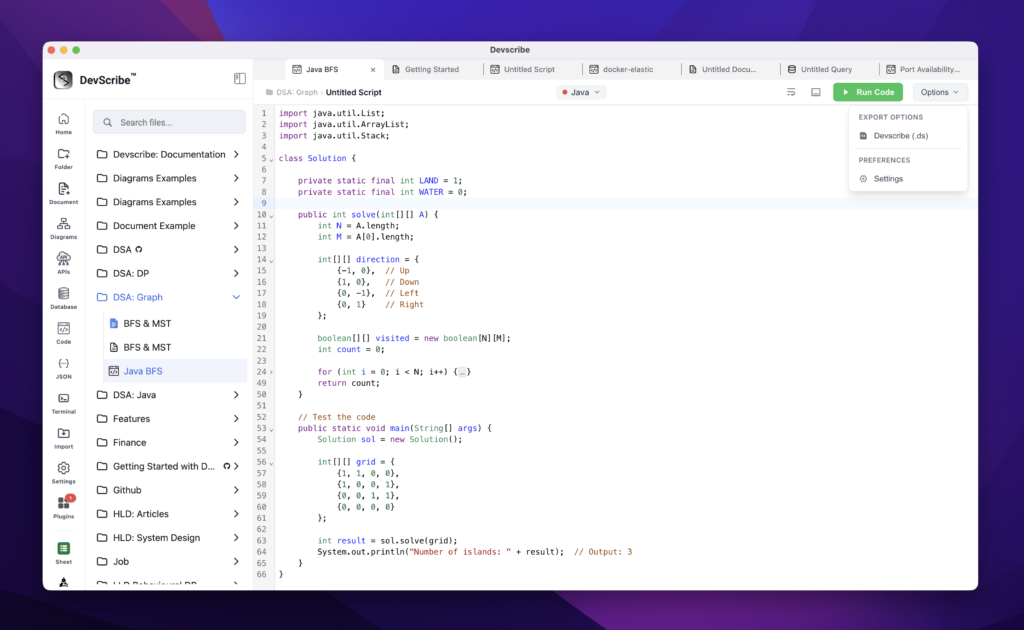
- Open the Code Editor Plugin.
- Open any Java code file.
- Click the Settings icon in the editor header.
- The Java Configuration dialog will open.
- Configure the required Java settings and click Save.
Configure Java Home
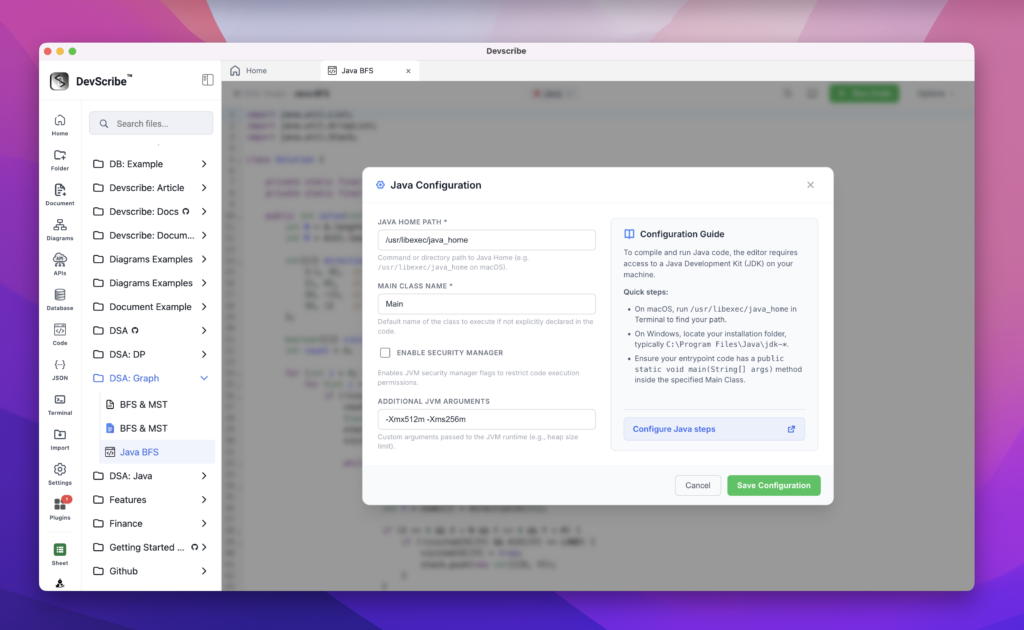
Java Home Path specifies the location of your JDK installation.
macOS
Run the following command in Terminal:
/usr/libexec/java_homeCopy the output and paste it into the Java Home Path field.
Windows
Run:
where javaLocate your JDK installation and provide the corresponding Java Home directory.
Linux
Run:
which javaor
readlink -f $(which java)Locate your JDK installation and provide the Java Home directory.
Configure Main Class
Enter the default Java class name that should be executed when your code does not explicitly specify one.
Default Value
MainAdditional JVM Arguments
You can optionally provide additional arguments that will be passed to the Java Virtual Machine (JVM) when your program executes.
Example:
-Xmx512m -Xms256mThese options configure the maximum and initial heap memory available to your Java application.
Save Configuration
After filling in the required fields, click Save. Your Java environment is now configured and you can start writing, compiling, and running Java programs directly from the Code Plugin.
